Sunday, October 2, 2011

Apple Cinnamon Spice Cake -- Betty Crocker Style

Months ago, I wrote about the Betty Crocker Baking Challenge.  You had to use their gluten-free baking mixes to make a holiday treat.  I started....  And didn't exactly finish because the end of my school year was a little wild!  And then I found out that Betty Crocker changed their Chocolate Cake mix to include soy flour which is a HUGE no-no for me [read about it here].  So while I did make a YUMMY Double Mint Chocolate Chip Cupcake, I cannot recreate it and make it save for me to eat.  This is a bummer since these cupcakes were a huge hit with my students.*

But, I did make an Apple Cinnamon Spice Cake.  I love apples...  But I am allergic to them in their raw form.**  So whenever I crave apples, I either have to bake with them or eat apple sauce.  This time I baked. 


Apple Cinnamon Spice Cake
This cake is really easy to make.  However, I did figure out a few tricks you need when baking with gluten-free mixes -- especially if you have to substitute the butter and/or milk to make it safe for you.

You will need:

1 box of Betty Crocker Betty Crocker Yellow GF Cake Mix
3 small apples, peeled and chopped up pretty small (I used a green color)***
1 T cinnamon
1 t nutmeg
1 t ginger
1 t cloves
3/4 t xanthum gum

The tricks (note that I only added things; I used the exact amounts of the extras the mix called for):

1)  Mix about 1/3 of the dry mix with your butter (or whatever you are using -- I used a combo of futter and shortening) to "cream" together.  When fully mixed together, add the xanthum gum.
2) Alternate the rest of the mix with the liquids until almost combined.
3) Finally add the apples and spices and continue to mix until fully combined.

Follow the rest of the box directions when it comes to baking times, oven temps, etc.  I used a 11x7 pan but feel free to make cupcakes, a sheet cake, whatever you want!

Cinnamon Frosting

You will need:

2/3 C shortening
1 package of powdered sugar
1 T cinnamon
hot water

Combine the first three ingredients in a mixer while slowly adding enough hot water to give you the frosting consistency that you want.  [I usually make a "thinner" frosting when using it for a one layer cake versus a "thicker" frosting for a two later cake or cupcakes.]

Frost the cake when it cools -- then enjoy!


*As much as I love eating everything I bake, I can't eat it all.  Plus I need people to try out my experiments to see if they even work!  This is where my students come in -- and co-workers.  They all get to try my treats while also giving HONEST feedback about it.  Sometimes I make them write about why they liked/disliked the treat.  Always thinking of creative ways to teach :)

**It is called Oral Allergic Syndrome and I just happen to have a pretty bad case of it.  In fact, I am so allergic to apples that I can often get a rash when cutting up the apples for baking. 

***Since I never actually eat raw apples, I have no clue how to pick out apples or what kind to get!  I either make whoever is with me pick them out or ask someone in the grocery store.  Pick whatever apples you like to bake with and you will be just fine!

Saturday, September 24, 2011

Bob's Red Mill

FH and I had TONS of weddings to attend this year (we have 9 -- and we aren't done yet).  One was in Portland, Oregon.  I found this to be the perfect excuse to go early and spend some time at Bob's Red Mill who happens to have their factory just outside of Portland. 
me in front of the mill
Bob's has the products to use if you are gluten-free.  They are the brand that carry all the needed flours to bake gluten-free.  They also have their own packaged mixes, but most contain garbanzo bean flour which I am allergic to...  But that doesn't mean I can't buy their other flours!

I had been told that you should go to Bob's to buy in bulk.  So away we went....

At first, I had sensory overload and spent about 10 minutes just wandering the factory store.  I finally got it together and hit up the bulk bins.  I can't even tell you how inexpensive it was.  Example:  You'd pay about $6-7 for one bag of brownie mix if you bought it in the store.  We got at least 5 bags worth of brownie mix in the bulk area for about $2.  AMAZING!

When we checked out, I felt like I was on the Extreme Couponing Show, although I didn't even need any coupons.  We easily got at least 75% off typical prices of the different flours.  I was so giddy, I called all my gluten-free buddies to share the good news!  If you live anywhere near Bob's and you are gluten-free -- I highly recommend going to shop!

Now, I just need another excuse to go back....

Wednesday, September 21, 2011

These Are A Few Of My Favorite Things....

It has been a while.  Sorry about that.  I was on vacation, teaching summer school (preschool!) and finally started my new year at school.  Luckily we are not on strike, like another district I know.  We ratified our contract the day before school.

It has been a hectic start to the school year.  New students that have caused numerous headaches already, switching from 4 class periods per day to 6 (quite the adjustment!) and I am also training for my first (and last) marathon!!

While training for this marathon (Nike Womens Marathon), I have been HUNGRY!  And there isn't much to eat with all of my allergies.  At least not the things that all the real runner people say to eat.  So I have been finding new things that are working to keep me hydrated, full, and running!

Before all the allergies, I drank chocolate milk after a hard workout.  Doesn't work anymore.  Now I drink Chocolate Coconut Milk!  Although it is difficult to find.  I have drive a ways to a Whole Foods to get my fix -- and I make sure to stock up.  It is the perfect after run drink! 

One of my newest favorite protein is Sunbutter -- especially the No-Stir kind.

I never liked peanut butter and jelly sandwiches growing up -- but now I am obsessed with sunbutter sandwiches!  Sunbutter and jelly, sunbutter and honey!  Yummy!

The hardest thing has been finding granola bars that are safe to eat.  You can find gluten free, but it has nuts and/or soy, you can find nut free but it has soy and gluten.  UGH!  I finally find just ONE that I can eat and it really isn't that bad tasting.  NuGo Nutrition Bars make one kid that works for me: the chocolate version!

I also have been having a hard time finding safe (and good) things to eat while running.  Not only can I not eat all the allergen stuff, I also can't have caffeine which happens to be in a lot of energy items for running.  I have found a few items to eat while running that I could recommend: Clif Shot Gel Chocolate, Clif Shot Bloks -- my favorite is strawberry, and Hammer Gel -- my favorite is Montana Huckleberry!

My marathon is three weeks away so pretty soon I will carbo-loading.  How do you carbo-load without gluten?!  We will find out -- stay tuned!  And I promise to update with a few recipes I have baked over the summer..... And I just got a Cooking Light Best Baked Goods special edition.  Can't wait to adapt some recipes!

Thursday, August 4, 2011

Mama's Ranger Cookies

I'm about to eat the Ranger Cookie!

Mention Ranger Cookies in my family and you can get varied responses: pure joy, anger because you might not have any on you, childhood, skiing....

I grew up taking a few trips to Sun Valley, Idaho to ski.  [Great skiing by the way.]  There was a place in Ketchum, Idaho (the town) that made these amazing cookies called Ranger Cookies.  We would get them anytime we went -- and usually take a few packages home with us.  But the cookies would eventually be gone.

My dad then found a way to order them to our house!  We would get a box in the mail piled high with Ranger Cookies.  There would be eight in a package -- two piles of four saran wrapped with a Styrofoam bottom.  Nothing fancy, but they were yummy!  We would freeze them and eat them straight out of the freezer.  Amazing!  The best was when you found a lost package buried in the freezer long after the cookies were considered gone. 

I am not sure why the cookies stopped -- I think because the company went out of business or something.  But somewhere along the line my mom ended up with a recipe.  And I adapted it so I could eat Ranger Cookies again!

Mama's Ranger Cookies (taken straight from my mom)

1 C palm oil shortening
1 C sugar
1 C brown sugar
2 eggs
1 tsp vanilla
2 C gluten-free flour blend
¾ tsp xanthum gum
1 tsp baking soda
½ tsp baking powder
2 C oats
2 C corn flakes cereal [I used gluten-free corn flakes
½ C sweetened shredded coconut

Heat oven to 350
Whip shortening and sugars
Add eggs and vanilla
Add flour, baking soda, baking powder (and xanthum gum!) and mix well.
Add oats, corn flakes and coconut and mix well
Greased cookie sheet [I used a silpat sheet]

Bake 10-12 minutes

These taste amazing frozen, warmed up -- or with vanilla "ice cream" :)

Wednesday, August 3, 2011

Challenge Update

I am sad to admit that no, I did not enter the Betty Crocker Challenge.

Things got just a little insane at the end of my school year which happened to be right around the time of the challenge due date. We had a few suspensions, a kid go to jail (yikes!) and an investigation -- all within the last 3 weeks of school. Entering a challenge was far, far from my mind!

But I did at least try and make a few different things: Apple Cinnamon Cake and Mint Chocolate Chip Cupcakes* (recipe coming soon -- I promise)!


*Plus, if I am going to enter a contest, then I need to try out the recipes a few times -- right? And STUPID Betty Crocker decided to change their chocolate cake mix and added SOY flour! NOT cool Betty Crocker, not cool. So I am no longer able to eat the chocolate cake mix. Therefore, I am not going to post the Mint Chocolate Chip Cupcakes -- since I can't eat the mix anymore, I won't be making it again. Maybe instead I should write Betty Crocker and ask why they changed the mix? Probably should calm down a bit before writing a not so nice email/letter.....

Friday, July 8, 2011

Grammie's Strawberry Shortcake

I bought some amazing strawberries at the store the other day.  And I love, love whip cream.  Love it.  So why not add shortcake and make a whole dessert?

Cybele Pascal makes a really good shortcake, but it is more of a group dessert thing rather than individual sized portions.  So I searched through my Grandma's Better Homes and Gardens New Cook Book.  (Not sure from what year but I know that it is the 8th printing and the pages are already yellowing....)  I LOVE using this book to cook.  It reminds me of my Grammie every time I open it.  But now I have to change a lot of what is in the book....


Grammie's Book

Grammie's* Strawberry Shortcake

2 1/2 cups gf flour blend
3 tablespoons sugar
3 teaspoons baking powder
1/2 teaspoon salt
1/2 teaspoon xanthum gum
1/2 cup shortening (or futter) -- either way, it should be cold
1 beaten egg
2/3 cup rice milk**
3-4 cups of sugared sliced strawberries (I used about 2-3 tablespoons of powdered sugar)
whipped cream (recipe to follow)

1) Put all dry ingredients in a mixer then cut in the butter until the mixture is like coarse crumbs

2) Combine the egg and the rice milk

3) Add the liquids to the dry ingredient/shortening mixture -- add liquids all at once -- mix only until moisten

4) Take all the dough and put on a floured surface (I sometimes like to use powdered sugar instead of flour), knead the dough gently for about 30 seconds, then pat out until about 1/2 inch thick round -- cut with a round cutter, then place on an ungreased baking sheet (although I did use a silpat sheet)

Bake at 450 degrees for 10-14 minutes (depends on the size of your cutter).


Whipped Cream

2 tablespoons cornstarch
1/2 cup rice milk
1/2 cup shortening
1/2 cup powdered sugar

1) Combine these two in a small saucepan -- be sure to whisk out all the lumps!  Heat on medium heat, stirring constantly, until it becomes thick.  Once thick and smooth, remove from heat and let cool.  [Note that once the mixture starts to go thick, it gets thick fast so keep stirring and don't cook it too long!]
2) While the milk/cornstarch mixture is cooling, mix the shortening and the powdered sugar together.  Add in the milk/cornstarch and mix until smooth.
You now have dairy and soy-free whipped cream (courtesy of Cybele).
Put it all together -- strawberries, shortcake, and whipped cream -- anyway you want!
I ate all the whipped cream before we could take pictures -- oops!!

*No, I never made strawberry shortcake with my Grammie -- we made grilled cheese and pickles!  But since it came from Grammie's cookbook, why not honor her?
**If you have coconut milk yogurt, you might want to try and add that instead of the milk or even do about 1/3 cup milk and 1/3 cup yogurt.  If you want!

Tuesday, June 21, 2011

Allergies on the Rise!

I was listening to the news the other night and heard something about food allergies.  This got my interest (food allergies and education -- that is what I turn the volume up for!).  Turns out food allergies are on the rise.  Newest data: 1 in 12 kids have some sort of food allergy.

Today Show Report

I also found this article: from CNN.  It was about a dad who lost his son to a food allergy.  It also mentioned that having a food allergy isn't "cool."  My favorite quote from the article:

"There's a sense of embarrassment associated with food allergies for teens in particular, especially when they have to decline a kiss from a date who has just eaten peanuts or other offending foods."

This could not be more true.  Those of you that know me, know that I found out about my allergies the hard way.  In college, I kissed a boy after he had eaten peanut butter.  And away I went to the hospital.... 

me and Steve (aka: peanut-butter boy) about a month after the hospital trip
[Don't worry, we are still good friends.  He is forever known as "peanut-butter boy" at my parents' house.  My mom always asks: "How is peanut-butter boy?"]

I found out later in life that I was allergic to peanuts.  And then tree nuts... and then soy.  Finally, adding wheat and dairy.  It was a HARD adjustment.  Especially when it came to my social life.  I hated, HATED, going out to eat.  Hated it.  I could never eat anything -- and the waiters always give you this horrible look and say "Oh, I am so sorry....."  It sucks. 

And yes, I had to ask boys what they had eaten before I kissed them.  Luckily, my amazing friends asked for me!  But it was embarrassing.  And annoying.  But necessary.  Going to the hospital telling the doctors that you kissed a boy and wound up in the hospital is not the best situation.  Hilarious, yes.  Fun, not so much. 

You would be surprised at how little people know about food allergies.  Yes, you can die from a food allergy.  It has happened.  More than I want to admit.  But food allergies are out there.  And becoming more prevalent.  1 in 12 kids.  You will know someone with food allergies.

Please, please learn more about food allergies -- make those with food allergies feel welcome and less embarrassed.*


*I must say that my friends and family are the best.  They often make things for me to eat or find places where I can eat.  I mean, my mom made an ENTIRE allergen-free Thanksgiving dinner last year.  Now that is just plain awesome!  And the Future Husband is constantly perfecting a gluten-free pasta recipe -- and making allergen-free ravioli -- YUM! 

Thursday, June 9, 2011

Calling All Recipes!

As I was looking up the Betty Crocker Gluten Free products, I came across this challenge.  So, those of you who read this -- what in the world should I bake?!  It doesn't have to be something that I have already baked. 

What do you want to see made safe for you to eat?!

I have about three weeks so send me your suggestions!

And of course, I will keep you posted on the trial and errors of my baking :)

Product Placement


I had to run to the store to grab a tomato for our dinner tonight.  And I also picked up some Betty Crocker Gluten Free Brownie Mix.  You didn't know those two items were in the same aisle?  I had had a rough day at work and the store didn't have chocolate sorbet....

So I figured I would buy the mix and then blog about it -- and eat some chocolate to make my day better!  It is tough trying to bake with allergies.  You can't just go to the store and buy a mix with a can of frosting and away you go.  It doesn't work that way.  You have to plan things out.  And go to the speciality stores to buy the ingredients you need.  Until Betty Crocker.  Who rocks, by the way!

You can now go to the store and get gluten free mixes.*  Chocolate Cake.  Brownies.  Chocolate Chip Cookies.  Vanilla Cake.  And my personal favorite: Bisquick!!!!  I have not tried any of them, until tonight!  (I am extremely excited to try the Bisquick!).

The recipe was really easy to follow.  Add 2 eggs, 1/4 cup melted butter (of course I used Futter) to the mix -- how easy is that?!  I used an 8x8 pan and glad I did.  The mix was really thick and I had to use a spatula to spread it out in the pan.  It also didn't rise very much (the reason I was happy I used the 8x8 pan). 

But.... after it cooled and I took a bite..... it was YUMMY!!!  And it was so easy to make.  I am HIGHLY recommending this product :)


*Make sure the mixes are also free of your allergens.  The brownie mix was safe -- and I actually think the others are safe as well.  Just use safe add-ins (like rice milk, egg replacer, futter, etc.) and enjoy!

Tuesday, May 31, 2011

Tips for Chicken Noodle Soup

I haven't been feeling well lately.  And I know why.  I have been "cheating" -- but no worries, not on the Future Husband.  I have been cheating on myself with food.  JA coined the term "cheating" and for us, it has stuck.  Cheating means not following our allergen diets, and eating things we know we are allergic to. 

For JA, this usually means "cheat-za" (or pizza).  For me, it is usually desserts.  But lately, it has been a little of everything.  The FH (Future Husband) and I have been travelling a lot lately.  At the end of April, we went to the wonderful wedding of my oldest friend -- it was in North Carolina.

(me and Jordan at her gorgeous wedding)

The food was amazing and how could I pass up true Southern BBQ?  Including fried chicken.  I just had to eat at Bojangles -- the best chicken and biscuits ever!  It all sure tasted good, but I didn't feel so good....

But that didn't stop me from enjoying myself in Vegas the next weekend.  I enjoyed all the amazing food Vegas had to offer -- including Serendipity's Frozen Hot Chocolate and the Pastrami Sandwich at the Carnegie Deli.  I just ate my way through Vegas.  And my stomach sure paid for it....


(eating my pastrami sandwich that I could barely fit in my mouth)

(me, Krystle (FH's cousin) and Dee (future mother-in-law) enjoying our frozen hot chocolates)

I continued to cheat throughout the next few weekends when we had family and friends in town.  It is just easier when we go out for me to cheat.  But it has caught up to me.  And my stomach and body are paying for it.

So tonight the FH made me his Nana's (great-grandmother) Chicken Noodle Soup.  This is an Italian style soup -- with meatballs!  Making chicken noodle soup gluten-free is very easy.  Regular soup doesn't have any dairy, nuts, soy as it is -- so all you have to do is replace the noodles. 

So some tips when replacing regular noodles with gluten-free noodles:

- don't use quinoa pasta -- it just doesn't hold up well with the broth
- our favorite brand is Tinkyada -- we actually use the shapes (like the pasta for kids)
- Lundberg pasta works well too
- COOK THE PASTA SEPARATELY!  Since you are using rice pasta, the pasta will continue to soak up the broth/liquid -- expanding the noodles and reducing your amount of broth
*so we add the noodles into the bowl and then pile on the soup -- we even store the noodles separately, just combine when you want to eat leftovers*

My tummy is starting to feel better :)  And I am not cheating for the whole month of June.  Wish me luck!  And enjoy your own soup when you are feeling under the weather!


Tuesday, May 24, 2011

Chocolate Pudding Pie

We had a BBQ with friends this past weekend.  And of course, I brought the dessert.  I had been reading Cooking Light and found a recipe for Rich Chocolate Pudding Pie.  It sounded delicious and pretty easy to make, so I figured why not try it!

I told JA about it and she recommended that I try a similar recipe in a cookbook that she is in love with: Cooking for Isaiah (it is a gluten and dairy-free cookbook).  I wanted to make both of them and then figured we could do a blind taste test to see which one would make the blog.

As I set about baking, I already knew which one I would blog about.  And the reason was simple: it was easier to make.*  This happened to be the Cooking Light version of the pie.   [I had to adapt a few things of course.]

AK’s Cooking Light Rich Chocolate Pudding Pie

Crust:
30 chocolate cookies (I used an entire package of Pamela's Cookies)
2 oz. unsweetened chocolate -- melted
1 oz. dark chocolate -- melted
1 tablespoon canola oil

To prepare the crust, place the cookies in a food processor and process until finely ground.  Add in the melted chocolate and canola oil; process until well blended.  Press the mixture into the bottom and up sides of a greased 9-inch pie plate.  Freeze for about 15 minutes or until set.

Filling:
¾ cup sugar
¼ cup cornstarch
¼ cup unsweetened cocoa
¼ teaspoon salt
¾ cup coconut milk (in the can and not light)
1 cup rice milk [mixed with the coconut milk]
2 large egg yolks
3 ounces unsweetened chocolate – chopped finely
1 ounce dark chocolate – chopped finely
1 tablespoon vodka
½ cup fresh raspberries

To prepare the filling, combine the sugar, cornstarch, cocoa, and salt in a large saucepan; stir with a whisk.  Add half of the milk [that you mixed together] and the 2 yolks; stir with a whisk until smooth.  Stir in the remaining milk.  Cook over medium heat for 5 minutes or until thick and bubbly, stir constantly.  [This took about 5 minutes for me, and the mixture was thick but not so much bubbly.]  Remove from heat and add the 4 ounces of chocolate.  Stir until smooth and add the vodka.  Pour into the set pie crust.

Cover with plastic wrap; chill 4 hours or until set. [I recommend putting it in the freezer.]  Serve with raspberries – use whip cream if you want.**

It was yummy and rich – you don’t need too much!
 

*While the other version turned out great, it was a little difficult to make.  You had to separate egg yolks and whites (not too hard).  Then you had to double boil the egg yolks, whites and also the chocolate.  The author didn’t give enough information to let me know the consistency of the yolks, so the first time, it was too thick.  Then the whites were too thin.  Then…. Finally on round #4, I got it right! This is why I chose to write up the other recipe J

**I found Rice Whip Cream and was extremely excited to try it….. Only to find out it tasted like crap.  I don’t recommend it and neither does JA.  We threw the can away!


Sorry there are no pictures....  I was too busy making the other version of the pie four times to take pictures.  But I can say that it turned out great and I will make it again!

Tuesday, May 17, 2011

Gluten Free Around the World

My parents just got back from a 10-day bike trip around Tuscany.  Jealous?  Agreed.  I have been to Italy before and fell in love with the food!  And of course the wine. 

So when my parents decided to go, I was excited for them but also a little jealous that I wouldn't be able to eat the delicious Italian food.*

Until I got this email from my mom:
WHAT?  And the best is that this menu is not from a town that any of us have ever heard of -- no Florence, Rome, Milan for this gluten-free menu!  It is from one of the towns my parents stopped at during their trip.  Now, these are "tourist" places -- but still -- this is Italy we are talking about.  The home of pasta and pizza.  And here, those that can't eat gluten can travel to the birth place of such amazing food [and history] and actually be okay! 

So tonight the Future Husband and I made pasta.  He is part Italian after all!  We made gluten-free ravioli!  It was stuffed with peas and goat cheese.**  Talk about amazing :)  [He and I are still working on our gluten-free pasta recipe -- we can't seem to get it "perfect" but we are getting there.]

So now, I can enjoy amazing gluten-free pasta here at home or in Italy.  And since we will be traveling to Europe next year, it is nice to know that I will be to find some things to eat.  Now if only the French made their bread gluten-free....


*I can eat some gluten.  I have found that if I eat too much in a short period of time, I get an icky rash on my arms.  Nothing itchy, just annoying and not the greatest looking.  So I tend not to eat gluten unless it is worth it.....
**I can handle goat and sheep cheese/milk.  Must be a lactose thing!  So I do use some of these products in my cooking/baking!

Tuesday, April 26, 2011

Coconut Cake


Easter just came and went and what better way to celebrate with a coconut cake?  So I set out to find a cake that would be wonderful for Easter dessert!


I started out using GF Goddess's coconut cake: found here (but of course I changed it).  I wanted 3 layers so I 1 1/2-ed the recipe:


Preheat the oven to 350 degrees F. Grease and line three 8-inch cake pans with a circle of parchment paper.


In a large mixing bowl, whisk together the dry ingredients:

2 1/4 cups tapioca starch
1 1/2 cups brown rice flour

3/4 cup sorghum flour
3/4 cup organic coconut flour2 3/4 cups organic cane sugar
3 teaspoons xanthan gum
4 1/2 teaspoons baking powder
3/4 teaspoon baking soda
3/4 teaspoon fine sea salt

Add in and beat:

4 1/2 free-range organic eggs, beaten, or egg replacer *I separated the last egg into a bowl and then just scooped out about 1/2 of it -- not an exact science at all*
1/4 cup canola oil
1/4 cup shortening
1/4 cup coconut oil
      *instead of just using 3/4 cups of oil, I separated that into 3 different 1/4 cups and did oil, shortening, and coconut oil since I am not a fan of straight oil*
1 1/2 14-oz can organic light coconut milk  *this was about 3 cups of coconut milk*
2 teaspoon lime juice

3 teaspoons vanilla extract
*my batter needed a little extra liquid, so I added 1/4 cups of rice milk*
*Mine baked for 33 exactly and turned out perfect*


Continue to beat until smooth. It should resemble a slightly thick and sticky cake batter.


Using a silicone spatula, divide and scoop the cake batter into the three prepared cake pans and spread evenly. Use wet hands, if necessary, to smooth out the tops. Bake in the center of the pre-heated oven, side by side for 33 minutes, or so, until firm and springy. A cake tester inserted into the center should emerge clean. Cool on a wire rack.

So, now that the cake was made, what to do about the frosting?  When researching for cakes, I found a Bobby Flay coconut cake that he had done for a "Throwdown" episode.  The cake had a custard filling.  That sounded wonderful.  But how to make a custard without dairy?  Why not try my new favorite ingredient, coconut milk?

There is light coconut milk which resembles more of a milk consistency and just regular coconut milk.  This is a thick and rick consistency -- something that resembles more of a cream consistency.  This could work....

Coconut Custard:

1/3 cup rice milk
3/4 cup unsweetened coconut milk
1/3 cup light coconut milk 
1/2 teaspoon vanilla
4 large egg yolks
1/3 cup granulated sugar
3 tablespoons cornstarch
2 teaspoons vodka
2 teaspoons lime zest
1/2 teaspoon pure vanilla extract

Combine the milks and vanilla in a medium nonreactive saucepan and bring to a simmer over low heat.


Whisk together the yolks, sugar and cornstarch in a large bowl. Slowly whisk the warm milk into the egg mixture then return the mixture to the pot over medium heat and bring to a boil, whisking constantly, until thickened. Scrape the mixture into a bowl and whisk in the vodka. lime zest, and vanilla extract. Let cool to room temperature then cover with plastic wrap and refrigerate until cold, at least 2 hours.

Then comes the tricky part....

Finishing the Custard:

2 tablespoons cornstarch
1/2 cup rice milk

Combine these two in a small saucepan -- be sure to whisk out all the lumps!  Heat on medium heat, stirring constantly, until it becomes thick.  Once thick and smooth, remove from heat and let cool.  [Note that once the mixture starts to go thick, it gets thick fast so keep stirring and don't cook it too long!]

Add to the custard along with 2 heaping tablespoons of shortening and about a 1/3 cup of powdered sugar.  Beat all of the ingredients together until custard is smooth.

(The boys -- my fiance and his friends -- who taste tested the custard decided that it was just amazing on its own!!)

The Frosting:

1 bag of powdered sugar
1/2 cup shortening
1 teaspoon vanilla
1 teaspoon coconut extract
enough hot water to make the frosting the desired consistency (I usually use around 1/4-1/2 cup)

Mix all the ingredients together -- add the water as needed.  Super easy!

Now to assemble the cake.  Take the three cooled layers and shave off the tops to make them all flat and smooth on top. 

Place one layer, cut side up, on a plate.  Spoon about half of the custard filling onto the layer -- put don't spread it out all the way to the edge, leave about an inch all the way around.  Place the next layer on -- cut side up again.  The custard will squish out to the edges!  Put the rest of the custard on doing the same as the first layer. 

Place the last layer on -- this time cut side down.  Finally frost the cake as you wish!  And if you want, put some shredded coconut on the sides of the cake.

[*By the way -- the foil is around the plate to make sure that the plate stays clean.  Just take 3 or 4 pieces and fold around the side of the plate.  Frost away then pull out the foil!  Et Voila -- a perfectly frosted cake and a clean plate!]

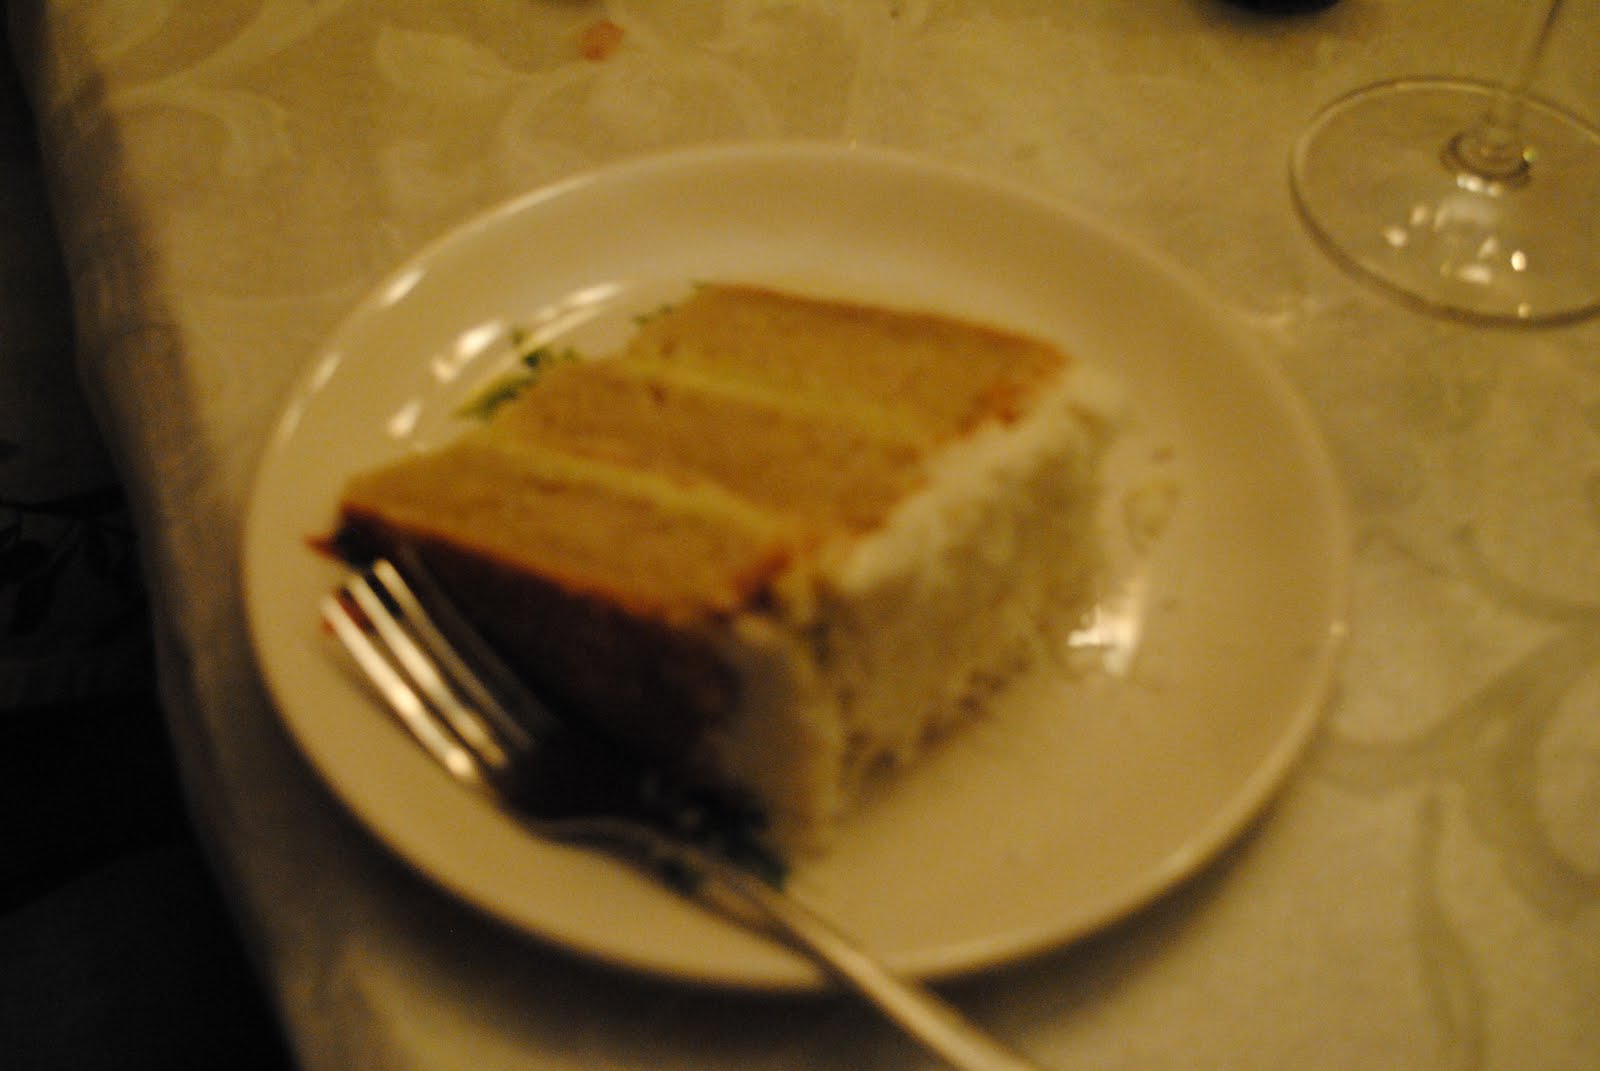
The cake being served at our "family" Easter Dinner!!!

The final product turned out pretty good.  I would tweak a few things next time -- like maybe using some rice milk mixed with coconut milk and I probably would not use sorghum flour.  I like the lighter textures of the not as "healthy" gluten free flours.  But, I still ate it and I still ate some seconds :)


Monday, April 25, 2011

Our Terms

We use some silly words around our two houses.  Everything often has "faux" in front of it!  Or we replace the first letter with an "f" -- to symbolize fake/faux.  We also use some of the same products over and over again.  When you find something you like and you can't really eat that much....  you stick with what you like!

So when you read:

1) Futter -- it really means our favorite butter alternative.  The amazing people over at Earth Balance have actually created a margarine-type spread that is soy and dairy free.  Did you know that margarine is made with soy? 

2) Shortening -- we are referring to the best butter substitute for baking.  Palm oil shortening.  And no, this is not the palm oil that everyone said was bad for you -- this is actually the pure stuff.  No words you can't pronounce in the ingredients!  The best brand (meaning free of other allergens as well) is Spectrum Shortening

3) Gluten Free Flour Blend -- we stole this from Cybele Pascal.  She really got us hooked on baking allergen free.  But since we aren't all that talented (yet) in playing with different flours, we have been sticking with her blend which is: Mix together 4 cups fine brown rice flour, 1 1/3 cups potato starch and 2/3 cups tapioca flours -- then put in a airtight container and put in the fridge!

More on the products we love at a later date!  But we have discovered "foreos!!"

Sunday, April 17, 2011

Lime Coconut Blueberry Scones

Yeah, I went a little overboard with the ingredients but they sure turned out good!  I had some blueberries and was craving scones.  So away I went...  I did a little research on the Internet for a starting off point but my favorite bloggers were of no help.  I did find one recipe that I was able to adapt.  These scones were not originally dairy-free so I adapted.  And I seem to be on a coconut kick, so why not make it rich without adding the fat of traditional cream!
 

Without further ado:

2 C GF flour blend [here]
1/2 C sugar + more for sprinkling
1 T baking powder
1/4 t baking soda
1/2 t salt
1/2 t xanthum gum
1-2 t lime zest
3 T futter
3/4 C coconut milk (use the stuff in the can -- and be sure to stir it first!) + more brushing the scones
1 egg
1 t vanilla extract
1 C frozen blueberries

1) Preheat oven to 425 degrees

2) Mix all dry ingredients (plus the lime zest) in a large bowl

3) Cut the butter in with a pastry blender or two knives, coating the pieces with flour as you go, until the largest pieces of butter are pea-sized. Keep this mixture cold, chilling it in the refrigerator if the butter starts to soften

4) Add in the blueberries

5) Whisk together the wet ingredients in a separate bowl

6) Add wet ingredients to dry ingredients. Stir until the mixture starts to hold together, then gently knead the dough a few times with your hands. Depending on your flour mix, the dough may be very sticky. While this makes it difficult to handle, it is okay. If the dough seems dry and won't hold together easily, add 1-2 T more coconut milk and knead it in (*I had to add about one more tablespoon of coconut milk*)

7) Put the dough on a large baking sheet (I used my silpat as well). Gently push the dough into a flat disk about one inch high. Cut into eight equal pieces and arrange them on the baking sheet about one inch apart. Brush some coconut oil onto the tops of the scones, the sprinkle with sugar.
(*Mine turned out pretty big, so you could easily make smaller ones*)

8) Bake for 10-12 minutes, or until a toothpick inserted into the middle of one comes out clean. (*Mine baked for 20 minutes!*)

They turned out a little purple but they sure tasted good.  They didn't need futter, or anything!  I couldn't believe how creamy they were -- by far the best scones I have ever made, even when I was baking with gluten and butter!

I am tempted to go back for seconds right now....

Saturday, April 16, 2011

Best Frosting EVER!

I (AK) am a teacher.  More specifically a special education teacher.  I teach students who are diagnosed with behavior disorders. They don't always have the easiest home lives, nor do they have a lot of people in their lives who care about them.  So -- I take whatever chance I get to let my knows know that someone cares.  Often times I do this by baking. 

HSPE (aka the new WASL) testing -- I made yummy brain food treats for the kids.  Birthdays -- they get to pick their birthday treat that I make and bring in.  Good week -- why not bring in treats?!

This led me to creating a YUMMY carrot cake.  We also had a potluck at school and the kids had a good week, so why not bring something in?

I had made a carrot cake from Cybele in the past and my students loved it.  But I wanted to try another recipe.  So I found this one: Living Without's Carrot Cake.  But as usual I changed it up.  To save space, I will just let you know what I changed.....

1) Instead of the 1/2 cup oil I used: 1/4 cup shortening (my usual Spectrum) and 1/4 cup Coconut Oil (I wanted some extra flavor and coconut oil works great without making it too rich)

2) I used my usual GF flour blend [here] and I did use eggs (not replacer)

3) The FROSTING!  It turned out so good that my co-workers just kept eating it off the top of the cake!
[A few weeks ago I found flavored goat cheese in the grocery store.  This was not just any goat cheese.  It was a cream cheese substitute.  The flavors were: coffee, fig, honey, and cinnamon.  Since I can handle goat (and sheep) products, I bought some to try.  It was delicious!]
So I decided to use the rest in my frosting since carrot cake traditionally has cream cheese frosting.  I luckily had bought the cinnamon goat cheese.  I used about 1/4 cup of the goat cheese and probably about the same amount of shortening.  I am really bad about measuring when it comes to my frosting!  I used an entire bag of powdered sugar (I think this ends up to about 9 cups).  I also added some cinnamon, ginger, and nutmeg (which is not part of a nut!).  So for my recipe:

Cinnamon Cream "Cheese" Frosting
1/4 C cinnamon goat cheese (I think the brand is Montchevre)
1/4 C Spectrum Shortening
about 1/4 C hot water (don't need to heat it up on the stove, just use hot tap water) -- and add a tablespoon at a time (you may need to add more or less to get the consistency that you want)*
8-9 C powdered sugar
1 t cinnamon
1/2 t nutmeg
1/2 t ginger

1) Put all ingredients into a mixer (I used my Kitchen Aid), and about 1-2 tablespoons of water and mix away!  Add more water as needed.

And enjoy -- don't eat too much of the frosting, you may actually need to frost the cake!  Let us know what you think!

*Depending on what you are making, you may want a runnier or thicker frosting.  When I frost cakes, I want it to be able to spread easily but when I frost cupcakes, I want the frosting a little thicker so it stays on top of the cupcake.  Just add water one tablespoon at at time so you don't end up with super runny frosting!  Experiment with flavors and amounts of water to powdered sugar to shortening ratio.  Frosting is hard to mess up!

Tuesday, April 12, 2011

Biscuits

It has been at least a year since I have eaten a good biscuit.  I always get a little sad when I go out for breakfast...  People around me get to eat the yummy, warm, and usually homemade biscuits with their breakfast.  However, I am stuck just wishing I could eat it.

But just last week I found a recipe that I could adapt. Away I went experimenting.

The first time I made these, I had to use real butter.  I was at my parents' house and I didn't have my "futter" (fake butter) or shortening...  They turned out good but made me a little sick.  So just today I remade them again today with shortening.  They turned out GREAT!

Here is the recipe for AK's Allergen-Free Biscuits:

2 C GF flour blend (see GF Flour Post) + more for dusting
1 1/2 T sugar
3/4 t xanthum gum (this binds everything together since there isn't gluten to bind, you need this!)
1 T baking powder\
3/4 t baking soda
1 t cream of tartar
1/4 C palm oil shortening or futter (either Spectrum Shortening or Futter) **make sure it is cold**
3/4 C rice milk (or whatever milk product you can use) **use up to 1 C as needed**
1 egg (you could also easily use egg replacer)

1) Preheat oven to 400 degrees

2) Mix all the dry ingredients together in a bowl.  Then in a separate bowl (or measuring cup) mix the rice milk and egg together. 

3) Cut in the futter/shortening -- use a pastry cutter or you can do all of this in your Cuisinart.  You should have pea size futter/shortening mixed in with the flours.  You don't want to fully mix in the futter/shortening -- this will not create the pastry that you want for moist, yummy biscuits!

4) Slowly mix in the rice milk/egg mixture.  This works best with a fork or wooden spoon.  You should have a sticky dough -- add more liquid or flour as needed.

5) On a floured surface (use the GF flour blend) pat out the dough to about an inch thick round thing.  Use a round cookie cutter, a cup -- anything round to cut the biscuits.  You should end up with about 10.  (You will need to put the dough back together and pat it out again a few more times to get all the biscuits cut).

6) Place biscuits on a greased cookie sheet (I use futter or shortening -- or you can use a silpat sheet).  Bake for about 15 minutes until golden brown!

I am continuing to experiment on how to make these just a little bit better.  So far these biscuits hit the spot, but I am sure I can make them even better....

[Since I/we are new to writing recipes -- let us know if anything you try on our blog that doesn't work!  We want everyone to eat the best foods possible, and if that means retrying or rewriting a recipe, we will do it!]